


Reimagining Innovation: Different Approaches, One Vision
We're so excited to share this guest post from Chompshop Ambassador Kristine Tsung, a third-grade teacher in Fremont Unified School District. Kristine took an after-school club and turned it into a schoolwide Innovation Lab. Here's how she did it, in her own words.
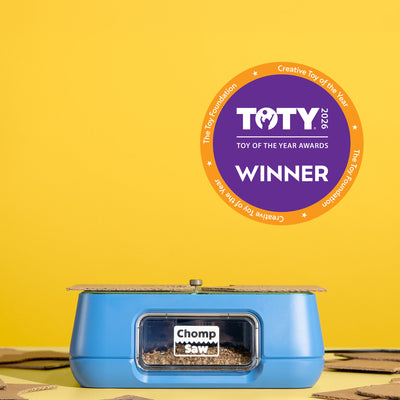
Expanding the impact of the ChompSaw to build a schoolwide culture of innovation.
By Kristine Tsung | Third-Grade Teacher, Fremont Unified School District | Chompshop Ambassador
My belief in art as an entry point into STEM comes from personal experience. As a child, I relied on art to help me learn, process ideas, and express my understanding. That experience continues to shape how I teach today.
Not every child initially sees themselves as an engineer, scientist, or inventor, but every child deserves the opportunity to imagine and create. With a ChompSaw, a simple piece of cardboard can begin as an artistic idea and evolve into an exploration of engineering, measurement, structure, problem-solving, and design.
Art inspires the idea. STEM brings it to life.
Key takeaways
- Art can be the entry point into STEM. A cardboard project can start as an artistic idea and grow into engineering, measurement, and design.
- Kristine's after-school Innovation Club grew from 28 students to nearly 300 in three years, then expanded into a school-day Innovation Lab.
- There are three flexible models for ChompSaw learning: guided creation, free exploration, and design challenges.
- No single approach is "best." They work together, and the magic often happens when you layer them.
- Letting teachers choose their own approach is what helped about 30 teachers sign up for the Lab within the first month.
Introducing the ChompSaw through our Innovation Club at Lila Bringhurst Elementary unleashed student creativity, transforming 2D sketches into 3D cardboard creations. What began as a small after-school club serving just 28 students quickly grew to nearly 300 within three years.
As interest expanded, so did our vision. That growth sparked a bigger question: How might we bring hands-on learning to every student during the regular school day, rather than limiting it to an after-school club, while empowering teachers to integrate it into their instruction?
Three flexible models for ChompSaw learning
As we expanded into a schoolwide Innovation Lab, I discovered something interesting: teachers approached cardboard creation in different ways. Some preferred structured projects, others encouraged free exploration, and some introduced open-ended design challenges.
Rather than expecting every teacher to follow the same approach, I recognized an opportunity to embrace these differences.
What if the key to scaling innovation wasn't standardizing its definition or prescribing specific projects, but empowering teachers to cultivate innovation in their own ways?
These observations led me to identify three flexible models for ChompSaw learning, each offering a different balance of structure, creative freedom, and student ownership.
Approach 1: Guided Creation
In guided creation, structure serves as the launchpad for personal expression. Everyone starts with the same blueprint, but no two final projects ever look alike.
Spotlight: Cardboard mooncakes & custom packaging
In one standout cultural art project, students used the ChompSaw to craft cardboard mooncakes along with custom-designed packaging. While the underlying structure was shared, each student transformed their piece with distinct colors, intricate patterns, and unique storytelling elements.

Student-created cardboard mooncakes and packaging. Photos and project credit: Yi Wang.
- Why it works: Guided projects build confidence with tools, develop craftsmanship, and strengthen the ability to follow instructions while allowing room for artistic expression. They're especially useful for introducing new tools or connecting hands-on making to classroom learning.
- Try it in your room: Challenge students to build cardboard picture frames, seasonal decorations, or architectural models. Provide the common scaffolding, then set them free to make it uniquely theirs!
Approach 2: Free Exploration
What happens when students have access to cardboard, creative tools, and the freedom to decide what to make? Unexpected possibilities emerge.
Without a rigid set of rules, the scrap bin becomes a treasure trove. One student turns a discarded triangular piece into a futuristic robot arm, while another sees the foundation for a mythical creature. Free exploration builds creative confidence, independence, and the resilience to adapt when ideas evolve mid-build. Sometimes, simply giving students the freedom to explore and create is enough. Not every activity needs a specific project or design challenge.

Students enjoy searching through the scrap bin for leftover cardboard pieces to repurpose into new creations.

A student transforms cardboard cutouts into a creative game.
- Try it in your room: Set out recycled materials, ask "What can you imagine?" and step back. Finish with a quick reflection where creators share unexpected discoveries and iterations!
Approach 3: Design Challenges
A third approach combines creative freedom with a shared purpose. Instead of assigning a specific project or leaving everything open, the teacher introduces a design challenge:
"How might we design something that makes someone's day easier?"
This type of question, commonly used in design thinking, invites multiple solutions. I especially appreciate the meaning behind these three words:
- How invites exploration.
- Might opens the door to possibilities rather than one correct answer.
- We encourages collaboration.
For example, given the prompt "How might we design a robot that helps someone?", one student might invent a cleaning robot, another a grocery-carrying robot, and another a robot that cares for pets. The challenge is shared, but the solutions are uniquely their own.
This approach introduces children to human-centered design by encouraging them to consider others' needs while developing empathy, problem-solving, collaboration, and prototyping skills.
-
Try it in your room: Invite children to respond to an open-ended challenge:
- How might we make recess more inclusive?
- How might we create something that helps an animal?
- How might we make an everyday task easier?
- How might we improve our community?
Encourage students to imagine, sketch, build, test, and improve their ideas.

Students prototype smart devices as part of an ELA lesson exploring advancements in technology.

Students develop their own technological solutions, including a car design.
Which approach is best?
The short answer? None of them and all of them.
| Feature | Guided Creation | Free Exploration | Design Challenge |
| Who decides? | Teacher | Student | Teacher sets challenge; student designs solution |
| Creative freedom | Personalization | Open choice | Multiple solutions |
| Main focus | Skills and expression | Curiosity and discovery | Problem-solving and design |
| Outcome | Similar projects | Different creations | Different solutions |
These approaches aren't a hierarchy, and they certainly aren't a competition. Think of them as complementary tools in your teaching toolkit, each perfectly tuned for a different moment in the learning journey.
In fact, the magic often happens when they layer together: students might build foundational skills through a guided project, spark unexpected ideas during free exploration, and ultimately bring everything to bear on a real-world design challenge.
So before launching your next hands-on session, ask yourself: Are we building core skills, fostering curiosity, or tackling a real-world problem? Let that answer guide how much structure you provide, and how much freedom you give students to lead.

A student freely tinkers and creates whatever she imagines. Sometimes, simply giving students the freedom to explore and create is enough. Not every activity needs a specific project or design challenge.
From one Innovation Club to a schoolwide opportunity
At Bringhurst, we put this flexible approach into practice by expanding from our after-school Innovation Club to a school-day Innovation Lab.
Rather than requiring teachers to prepare elaborate projects or follow identical lesson plans, we provided shared tools, cardboard, and the freedom to choose how their students would create. Within the first month, approximately 30 teachers signed up to use the Lab, potentially reaching nearly 800 students.
What made this possible wasn't a single project or teaching method. It was creating an environment where teachers could participate in ways that worked for them. By making innovation more accessible to teachers, we made it more accessible to students.

A student uses ChompSaw tools to make precise cuts in cardboard, creating a custom helmet mask based on his own design.
Bringing innovation to your school
You don't need an elaborate makerspace to begin. Start small with a few ChompSaws, scrap cardboard, and an open invitation to create. Introduce the three pathways so teachers can choose the approach that best fits their instructional goals.
The key isn't expecting every classroom to define innovation the same way or create identical projects. It's empowering teachers to bring innovation into their classrooms in ways that reflect their unique teaching styles and instructional goals.
Whether students are mastering new techniques, exploring possibilities with scrap cardboard, or prototyping solutions to real-world problems, innovation thrives when teachers feel empowered to bring their own creativity into the learning experience.
Because the true power of a ChompSaw isn't just what it can make, but what it makes possible.

Kristine Tsung teaches third grade at Lila Bringhurst Elementary in Fremont Unified, serves as a Chompshop Ambassador, and founded InnovatorsTogether.com to spark STEAM creativity in every classroom.
Frequently asked questions
What are the three approaches to ChompSaw learning?
The three approaches are guided creation, free exploration, and design challenges. Guided creation gives everyone the same blueprint to personalize, free exploration lets students decide what to make, and design challenges give students one shared prompt with many possible solutions.
Which approach is best for my classroom?
No single approach is best. Kristine recommends choosing based on your goal for the session: guided projects for building core skills, free exploration for fostering curiosity, and design challenges for tackling a real-world problem.
Do I need a makerspace to start?
No, you don't need an elaborate makerspace. You can start small with a few ChompSaws, scrap cardboard, and an open invitation to create.
Is the ChompSaw safe for students?
Yes, the ChompSaw is a real power tool designed for kids ages 3+, with no exposed blades and no spinning parts. It's been independently tested to safety standards for ages 3+ .